Products description
Properties
- high quality EL-panel with light off colour: pink and light on colour: white
- all around lamination by factory for proper protection
- 2 solderable contacts
- overall dimensions(LxWxH): 19.5mm x 222mm x 0.33mm
- luminous dimensions (LxW): 18mm x 220mm
- lifetime >3000 hrs (= 50% of initial brightness, useful lifetime >10.000 hrs)
- luminance ~ 10 cd/m2 (depends on voltage and frequency of inverter)
- EL-panel can be cut by scissors if you need a smaller luminating area
- shipping in a stiff and stable box to prevent a buckling of the EL-panel for a safe transport worldwide
Main applications
- replacement backlight EL-lamp for display of Emagic Logic Control
- replacement backlight EL-lamp for display of Mackie Control
- replacement backlight EL-lamp for display of Mackie MCU Pro
- replacement backlight EL-lamp for LCD of Displaytronic ACM5502A
- other replacement applications and devices
- ultra small and flat lighting applications
- white night light
- design and art objects
- light spots
- emergency lights
Notes
- Here you can find a nice and perfect installation video of Matt Ottewill. It deals with the backlight installation from minute 1:33 to 5:55. Subtitles can be switched on and they are in english.
(Notes: Application listing is uncomplete and without warranty.)
Customer reviews:
No problem with this product. Shipping is fast, packaging - well protected and customer support was really helpful. So order without any doubts.
First I would like to thank Backlight4you for their service. They have sent me panel in a very robust envelope which did excellent job of protecting it during the transport.
I bought it for my Mackie MCU Pro, and the whole process of replacement was in fact quite easy. If you have basic soldering skills and just a little bit of patience, there is really no reason why you shouldn't do it yourself. Just be careful to remember where each set of screws go, and you will have no problems.
Dears @ backlight4you,
I received the strip safely and quickly and I thank you for that.
I succeeded in changing this without problem, following the notice that come along and watching Matt Ottewill's instructions on YouTube:
https://www.youtube.com/watchv=eeRHw711IFw&feature=em-commentsI
I'm over the moon with my new back-light strip. You are doing a fantastic job to provide us with such good product and quality service.
Deep thanks for all the help provided.
Best wishes.
Fantastic product. Totally fixed my MCU pro's for a fraction of the price of the Mackie part. I had an MCU Pro and an extender to do so I got 2 goes at it. I took many ques from the previous review and he is mostly right on the money. I'd just like to add my observations. The original backlights are not glued at all. The first one I did was slightly pinched under the frame so I couldn't slide it out. I loosened the metal tabs and pressed them in just enough that I could slide the old one out. The new Backlight4you one slid right in and I bent the tabs back in place being careful to provide a little downward pressure. This way I managed to avoid any of the previous reviewers problems with lining things up or reversing the lcd. It seemed likely to me that the new one could have been slid in right on top of the old one without removing it. I resolved to try that on the second one. Luckily (or unluckily for experimentations sake) the second one slid right out without me having to touch the tabs. I still gave sliding the new one in on top of the old one a try and it seemed like it would work fine that way. The leads are slightly shorter that the originals so you have to fold them carefully and pin them with an alligator clip or similar soldering tool. This also helps with keeping the lead from getting too hot. All in all it only took me about an hour and a half to restore my MCU's to nice bright lcds and most of that time was spent removing and replacing screws. I'm generally pretty good at this stuff but I'm certainly no pro. If you have basic mechanical and soldering skills this is a pretty easy procedure. Thanks Backlight4you!
Great product, making my almost completely dark Mackie MCU Pro backlight back to live! After replacing the backlight strip, which demands a bit of patience and care and is more something for the experienced electronic technician, the Mackie Control looks and works as new. And that is of course also thanks to the very clear instructions how to handle and generally install the backlight strip. Hats off for the backlight4you people for this clarity.
Provide a proper hardfoam support to be able to put the MCU on its front and let it then rest on the space at the beginning of the faders and the black upright part in the back.
Mind that when taking everything apart of the MCU, which is pretty much straight forward and does not require more than paying a lot of attention, to watch carefully which bolt came out where and put everything carefully in the sequential order. And there is a little challenge as well, you have to manage to unscrew and later screw under a 90 degree angle with not more than a shallow space. And when you take the last part of the display apart, please mark it somehow e.g. with a little scratch on the side of the black display frame and the circuit board. Otherwise you get gibberish on the screen when you have turned it 180 degrees, unfortunately that is what I had to overcome. Please test before you completely reassemble the unit, but be careful not to touch the backlight connection and circuit because of the moderately high voltage that might give you a nasty knock.
Before reassembling, it is perhaps a good moment to clean the inside of the display screens (I also did the LED digit board) with the proper cleaner, like multimedia display cleaner agent. This way I got rid of a haze that was surrounding the digits.
Happy renewing and thanks again, backlight4you, for your outstanding service.
Customers who bought this product also bought the following products:
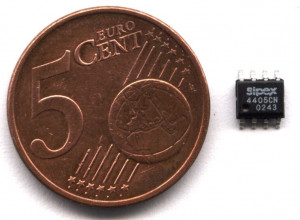
Sipex SP4405 driver chip for all kinds of EL-panels in nsoic 8-pin package. Operating voltage 2.2Volt up to 4.5Volt DC.
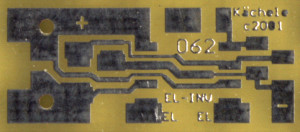
Development pcb for SIPEX SP4405 nsoic 8-pin EL-driver chip. Dimensions: 20mm x 8mm x 1mm
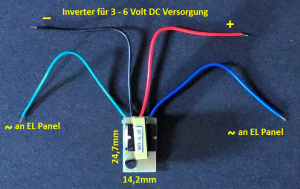
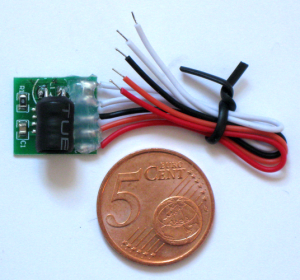
EL-inverter without housing for 2.2 up to max. 5 Volt DC power supply. For our EL-panels up to 60 cm2. Dimensions without cables (LxWxH): 15mm x 14mm x 9.5mm
This Product was added to our catalogue on 23/03/2013.


